The Beginners Guide to Music Production
Music production is a creative process that involves capturing, shaping, and presenting music in a way that appeals to the audience. It’s a compelling blend of art and technology that requires the right skills, equipment, and understanding of sound and acoustics.
Excelling in music production begins with understanding its core concept, which involves creating and refining music tracks. An essential step for beginners is to acquire some basic equipment such as a computer, headphones, microphones, and audio interfaces. Incorporating digital audio workstations (DAWs) and virtual instruments like drum machines and synthesizers into the production process can revolutionize your music creation efforts.
The art of recording involves capturing both external sounds like your voice and virtual sounds from your instruments. However, the importance of room acoustics and silence shouldn’t be underrated, as they greatly impact the quality of sound captured.
Ultimately, the magic happens in mixing and mastering where tracks are layered, balanced, and polished to create a finished piece. Lastly, remember that continually boosting your skills through practice and learning new techniques is instrumental for your journey in music production.
Contents
- The Beginners Guide to Music Production – At a Glance
- What’s Involved in Music Production
- Essential Equipment for Starting Music Production
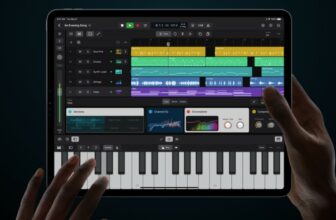
- Digital Audio Workstations and Virtual Instruments
- The Art of Recording: External Sounds and Virtual Instruments
- The Importance of Room Acoustics and Silence
- Mixing and Mastering: The Post-Production Process
- Boosting your Skills and Practice Techniques
- Conclusion
The Beginners Guide to Music Production – At a Glance
- Music production is a creative process that involves actively shaping and presenting music for an audience.
- To get started in music production, you’ll need a computer, digital audio workstation (DAW) software and plugins, an audio interface, a microphone, monitoring equipment, and a MIDI controller (optional).
- The recording process involves capturing external sounds and virtual instruments and the importance of room acoustics and silence should not be underestimated.
- Mixing is all about balancing individual track volumes, panning elements, applying EQ, and adding effects.
- Mastering is the final touch to your track, ensuring it sounds good on speakers of all sizes and types.
- To continuously strengthen your skills, you’ll need to practice regularly, learn from others, embrace originality, and study industry-standard music.
What’s Involved in Music Production
Music production is a fascinating journey that takes raw music ideas from their inception, through several stages of refinement, and finally presents them as finished products. It’s a process that’s akin to sculpting, where you begin with a broad mass (pre-production) and meticulously carve it into a masterpiece (post-production).
The concept of music production starts with pre-production, where raw ideas are formed. This can involve songwriting, arrangement, and laying out the initial structure of your music. Following this, you enter the recording phase, which is where you capture all the elements of your track, be it instrumental sections, vocals, or ambient sounds.
The next step is arguably the most technical – mixing. During this stage, all the elements of your track are leveled, panned, and equalized to ensure they blend together seamlessly. This stage also often involves adding effects like reverb or delay to enhance the sonic characteristics of your track.
Finally, we reach post-production which primarily involves mastering. Mastering is the final gloss on your track, ensuring it will sound good whether it’s played on a high-end sound system or through a smartphone speaker. It provides the finishing touches that truly bring your music to life.
Remember, understanding the concept of music production is the foundation upon which you will build your creative journey.
Essential Equipment for Starting Music Production
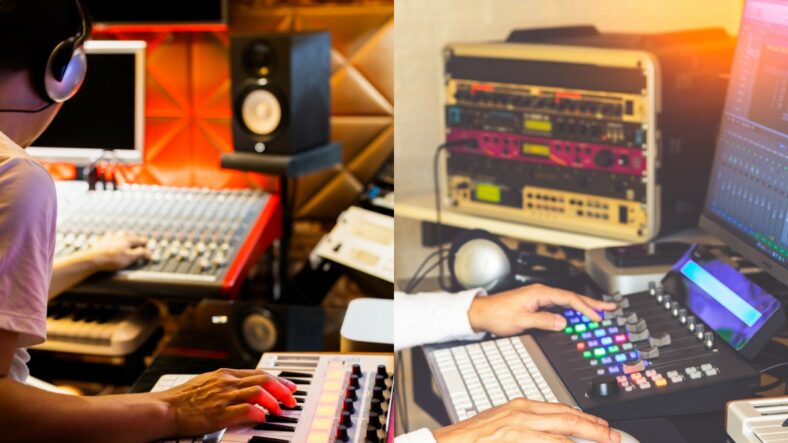
Starting on a music production journey, you’ll need to equip your workspace with a few essential gears including a computer, a DAW, an audio interface, a microphone, and monitoring equipment. These tools will play a significant role in the quality of your output, whether you’re recording music or creating digitally.
1. Computer
To begin with, a computer is essential for home recording in the 21st century. Whether it’s a desktop or a laptop, PC, or Mac, ensure that your computer meets the minimum system requirements for your recording software or Digital Audio Workstation (DAW). Every DAW program has its specific minimum system requirements.
Higher-spec computers can handle more processing, enabling you to use multiple plugins simultaneously. Conversely, low-spec machines may struggle with certain processing tasks, resulting in lag and hindering your workflow.
While technically possible, it is recommended to use a computer rather than a tablet for home recording. If you do choose to use a tablet, you may need additional gear that is compatible with your device such as an audio interface or MIDI controllers.
2. Digital Audio Workstation (DAW) Software
A DAW is where you’ll do most of your music production work, from recording to mixing. Tools like Logic Pro, Ableton Live, or FL Studio are quite popular in the industry.
If you’re using a PC, then Logic Pro and GarageBand will not be an option as they are Mac-only Digital Audio Workstations (DAW). However, if you own a Mac, they are both easy to use and each one has its own benefits.
Logic Pro is great for audio recording as well as MIDI sequencing if you choose to explore that side of music. GarageBand is free to Mac users which makes it an ideal starting point for those completely new to computer software. Lastly, Ableton Live is a great choice when needing a DAW both for recording and performing live as it is suitable for both.
3. Audio Interface
The next stage involves establishing a connection between your microphones or instruments and your computer. An audio interface serves as a device that facilitates this connection by linking your microphones and allowing you to adjust the input levels of your DAW for sound processing. Its purpose is to convert analog signals from your sound source into digital signals that can be utilized and manipulated on your computer.
If you already have an audio interface, there is no need to purchase a mixer as all mixing tasks can be performed digitally within your computer’s DAW software.
Audio interfaces are available in various sizes and configurations, with a key factor being the number of inputs they offer. Inputs correspond to the number of microphones or instruments you wish to record simultaneously, typically using XLR connections for most microphones and ¼” TRS connections for instruments like guitars.
For instance, if you only plan to use one microphone, a basic interface with a single input will suffice. However, if you aim to professionally record a drum kit or employ multiple microphones, a larger interface with more inputs will be necessary.
Without an audio interface, your microphones would be ineffective for digital recording. There is an exception to this rule, which is the USB microphone, although I still recommend following the traditional setup we discussed earlier. Most interfaces connect to your computer via USB and typically include the necessary cable for establishing this connection.
4. Microphone
A good quality microphone is necessary for recording vocals and instruments. There are two main mic types used for recording purposes, dynamic and condenser microphones.
Dynamic microphones like the SM57 and SM58 are useful for home recording as they reduce background noise and echoes. They are durable and suitable for rooms without acoustic treatment or high-noise environments.
Condenser mics, like the Rode NT1, are more sensitive and provide high-quality recordings but require a well-treated silent room to minimize background noise.
Using a microphone stand is essential to minimize vibrations and noise caused by hand movement. Also, you should consider getting a pop filter to reduce unwanted noise if you will be recording vocals. Pop filters are inexpensive tools placed in front of the microphone to prevent explosive sounds during recording and improve audio quality.
To achieve the desired sound quality, you may need various microphones or use basic ones and focus on mixing. Recording tracks separately, such as guitar and vocals, can result in clearer recordings and easier mixing. However, for complex instruments like drums, capturing good sound with a single mic is challenging.
5. Monitoring Equipment
To complete your music recording setup, you’ll need headphones and/or monitor speakers. You should go for special monitoring equipment with flat EQ levels to hear your recordings as raw as can be.
Studio monitors provide accurate sound reproduction with a “flat frequency response,” unlike consumer models that often emphasize bass or lack sound quality. Due to their superior sound quality and frequency response, I highly recommend choosing studio monitors over regular speakers.
Using studio monitor stands can minimize sound distortion caused by vibrations, ensuring an accurate representation of your music during playback and mixing.
Headphones offer a different perspective on your mix, providing better stereo depth perception, especially when panning between left and right. It’s important to mix well for both headphones and speaker systems since many listeners use headphones.
While headphones are useful, it’s advisable to primarily rely on studio monitors for mixing. Excessive headphone use at high volume levels can damage your hearing, so be cautious. Refer to our article on the dangers of listening habits for more details.
Digital Audio Workstations and Virtual Instruments
Stepping into the realm of software in music production, Digital Audio Workstations (DAWs) and virtual instruments serve as essential tools for creating and fine-tuning your music.
Digital Audio Workstations (DAWs): This software serves as your digital playground for music creation. Powerful platforms like Ableton, Cubase, or Logic Pro offer a wide range of features including recording, mixing, and MIDI sequencing. They also support a variety of formats and plug-ins, making them highly versatile tools.
Plug-Ins: Plug-ins are tools used in digital audio workstation (DAW) software that can be used to create sounds and manipulate audio. They are similar to physical sound processors, like guitar pedals or mixing consoles, but are operated virtually, inside the DAW software.
DAW plugins can be crucial for recording, mixing, and mastering your audio projects. They are available in a variety of formats and come in different categories, including instruments, effects, and midi effects. They can be used to add depth, color, and space to a track, as well as EQ, compress, and limit your sound.
Some common DAW plugins include virtual instruments, compressor plugins, equalizers, delay and reverb plugins, and more. Virtual instruments recreate sounds from other instruments such as keyboards or strings, while compressor plugins are used to tame loud signals. EQ and delay plugins can be used to shape frequencies and add ambiance and texture to your tracks. Reverb plugins add depth to a mix, and midi plugins can be used to control other instruments or track parameters.
Virtual Instruments: They are software-based representations of physical instruments, like a piano or drum kit, that you can play using your computer or MIDI controller. Virtual instruments are a great way to experiment with different sounds and can be conveniently incorporated into your tracks in a DAW.
You can play virtual instruments with your mouse and keyboard or you can have a MIDI controller to play them easier in a more familiar way.
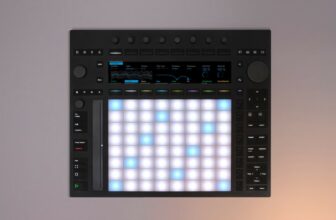
MIDI Controllers: MIDI controllers are hardware devices, such as keyboards or pads, that allow you to perform and record virtual instruments in your DAW. They bring a tactile element to your music production, making it feel more like playing a traditional instrument.
These components form the backbone of your digital music production setup. The DAW is your studio, the virtual instruments are your orchestra, and the MIDI controller is your conductor’s baton. Wielding these tools effectively will allow you to create compelling music.
The Art of Recording: External Sounds and Virtual Instruments
Entering the recording process, we find the art in music production. You are no longer simply creating sounds; you’re documenting them, capturing performances from real-world instruments, virtual counterparts, environmental sounds, and more.
Recording Real Instruments: Recording live instruments or vocals requires a quality microphone and room setup. The aim is to capture the purest signal you can with an appropriate audio input level to avoid distortion.
You can use microphones to record acoustic instruments like pianos, percussion, acoustic guitars, flutes, etc. If you are recording electric instruments like keyboards, electric guitars, acoustic-electric guitars, electric violins, etc. you can directly plug them into your audio interface and record them directly into your DAW without the need of a microphone.
Recording Virtual Instruments: In the case of virtual devices, recording involves using MIDI controllers or your keyboard and mouse to play and record your performances directly into your DAW. The beauty here is you can edit and tweak the performance until it sounds exactly how you want it to.
Capturing Ambient and Environmental Sounds: Outside the confines of traditional instruments, recording environmental sounds can create a unique texture in your music. From the chirping of birds to the sound of rain, anything can become an element in your music. You can use a microphone and a smart device or a computer or a portable voice recorder like Zoom H4n to capture ambient and environmental sounds.
In all cases, it’s important to ensure your input levels are set correctly. Too high, and you risk harsh clipping noise. Too low, and your audio might get lost in the mix. Set levels so the loudest parts of your recordings reach somewhere around -6dB, giving you a healthy signal without clipping.
Mastering the art of recording—be it external sounds or virtual instruments—furthers your ability to create resonating tracks, providing a diverse palette of sounds for your creations. And do not forget most of the experience with recording comes with trial and error. So, do not hesitate to experiment until you get the best result for your project.
The Importance of Room Acoustics and Silence
You might be surprised to discover that the environment in which you record is as important as the equipment you use. Room acoustics and the overall quietness of your recording space can have a significant impact on the quality of your sound.
• Room Acoustics: The shape, size, and composition of your recording room will affect how sound behaves within it. A well-set-up room can help minimize unwanted reverberation and echo, ensuring you capture clear, clean audio.
• The Importance of Quiet: When recording, it’s critical to have as silent an environment as possible. Background noise can muddy your recordings, reducing the overall audio quality.
• Pop Filters and Other Gear: Accessories like pop filters can help further refine your recordings, reducing unwanted noises in your captured audio. Plus, don’t overlook the importance of suitable stands and cables.
Investing time and care in optimizing your recording environment – including considering room acoustics and silence – is vital in setting up an effective home studio. A well-prepared room will act as the invisible hand that elevates the quality of your productions.
Mixing and Mastering: The Post-Production Process
Post-production is where your recording truly transforms into a polished piece of music. This stage consists of mixing and mastering, two critical processes that refine and enhance your audio.
Mixing is all about balance. This process involves adjusting individual track volumes, panning elements for stereo placement, applying EQ to cut out harsh frequencies and enhance pleasing ones, and adding effects like reverb and delay. The goal is to ensure all elements of your song coexist harmoniously.
Mixing is an article topic on its own as there are so many plug-ins and different techniques for each genre. There are so many plug-ins, effects, and ways to mix tracks that it is one of the most important steps of music production along with recording, that affects the overall sound quality of your song.
Mastering: This is the final phase in music production. It’s about tweaking the mix to make it shine on as many speakers as possible, from earbuds to large sound systems. Mastering engineers adjust EQ for overall balance, apply stereo enhancement, check phase issues, and add limiters to increase overall loudness.
Both mixing and mastering require a keen ear and a deep understanding of how sounds work together. While they can seem intimidating at first, learning the basics of these processes is an essential part of every producer’s journey. It’s the expertise in these areas that helps a track move from simply being good to truly outstanding.
Boosting your Skills and Practice Techniques
Polishing your music production skills is an ongoing process. It involves consistent practice, being open to feedback, experimenting with originality, and studying industry-standard music.
- Practice: The mantra ‘practice makes perfect’ holds true in music production. Regular interaction with your DAW, and experimenting with various settings and tools, helps in mastering the art.
- Seek Feedback: Sharing your work with others and inviting their opinions helps identify your strengths and areas for improvement. Constructive criticism could offer insights that you may have overlooked.
- Embrace Originality: While it’s helpful to learn from others, don’t shy away from original concepts. Experimenting with unique ideas can lead to fresh sounds and innovative productions.
- Studying Industry-Standard Music: Analyzing professional tracks can offer valuable lessons. It gives you a reference for mixing, mastering, and arrangement, helping you understand what makes a track stand out.
Remember, every successful producer you admire was once a beginner too. Don’t get discouraged by initial challenges. Persistence and a burning passion for music can help you progress faster and carve your niche in the world of music.
Conclusion
To sum up, music production is a beautiful blend of art and science that allows you to express creative ideas in sonic form. It is a journey that begins with understanding the concept of music production and getting the necessary equipment. Transitioning to digital realms, you encounter digital audio workstations, virtual instruments, and the world of MIDI. You then dive deep into the art of recording, capturing both external sounds and virtual instruments, all while knowing the importance of room acoustics and silence.
The journey doesn’t end here, though. With the completed recording, you step into the technical world of mixing and mastering—a critical stage that takes your work to another level. Remember, to keep refining your skills through practice, remain open to feedback, and never shy away from originality. Music production can be a complex endeavor, but with patience, dedication, and a dash of creativity, you’re well on your way to creating a masterpiece.