Acoustic Treatment – The Ultimate Guide
Acoustic treatment is the process of customizing the acoustic properties of a room for recording and mixing music. Acoustic treatment is important for audio professionals because it can influence the overall sound quality of a recording or mix.
A room with proper acoustics should have a neutral and pleasing sound, meaning it shouldn’t interfere with a recording nor cause significant changes to a preferred sound source (such as monitors and studio speakers).
Acoustic treatment is different from soundproofing. While soundproofing is about isolating the sound in a room from the outside, acoustic treatment is about creating an ideal music-listening balance within a room. In a nutshell, soundproof is about sound containment, while acoustic treatment is about sound quality and reliability.
There are at least three standard products for customizing the acoustics of a room and improving its response to unwanted reflections: bass traps, diffusers, and acoustic panels. But before going into detail and learning what these are all about, it’s important to understand how sound reflection works within a room, and why it is so determinant for recording and monitoring music.
Contents
- How does sound reflection work?
- What is comb filtering?
- What is the basic goal of acoustic treatment?
- Studio monitor placement
- Sound absorption and sound diffusion
- Essential products for acoustic treatment
- Five Tips When Adding Acoustic Treatment to Your Room
- Acoustic Treatment vs. Soundproofing
- Does acoustic treatment make a difference?
- Why is acoustic treatment expensive?
- Is it better to spend more on acoustic treatment and less on your monitors?
- Summary
How does sound reflection work?
Every sound is a wave that moves through the air, but also through liquids and solids. And whenever a sound wave hits a surface, it bounces back, creating a reflection.
Different surfaces have different levels of sound absorbance, but the untreated walls of a room will typically cause a high amount of reflection.
In music production, sound reflection can be a problem. Why? Because the sound waves reflected in the surfaces of a room will be bounced back to your position and influence the way you’re listening to a mix or recording.
In other words, you’ll not just be listening to the “pure” sound that’s coming out of your studio monitors, but to a combination of the sound generated by the monitors and the reflections generated by the surfaces of the room.
When mixing and mastering, nothing is more important than analyzing the sound coming from your studio monitors as accurately as possible. To achieve this, you need to limit the amount of sound reflection generated by the surfaces of a room and avoid comb filtering.
What is comb filtering?
Comb filtering occurs when two or more sound waves have a slight delay between them.
Comb filtering is the main reason why acoustic treatment is so essential for accurately monitoring sound.
Imagine that a signal comes out of a set of speakers and is later reflected by one or more surfaces. Anyone inside the room will be simultaneously listening not only to the “pure” sound signal that’s being reproduced by the speakers but also to its many reflected signals.
When these signals combine as the sound data that is being picked up by your ears, they can give way to peaks and phase cancellation and cause you to make mixing and mastering mistakes.
Peaks happen when two or more sound waves occupy the same space, creating a perceived illusion of loudness. Peaks are very common in rooms that are not treated for dealing with low-frequency reflections. Low-frequency peaks can trick you into thinking that your mix needs less bass and give way to different mixing mistakes.
Phase cancellation occurs when two identical sound signals are out of phase (i.e., reflected with a slight delay) and also influences the way the overall sound in a room’s perceived. When phased by 180 degrees, two identical sound waves get completely canceled, meaning you can’t even listen to them!
While sound reflections don’t always give way to phase cancellation, they can generate multiple phase issues that will make it harder for you to properly listen to a mix.
What is the basic goal of acoustic treatment?
The basic goal of acoustic treatment is to create a reflection-free zone for improved sound monitoring.
As an audio professional, you want to listen to the sound that’s being reproduced by your monitors as accurately as possible. To do so, you need to review your position in the room and eliminate as many surface reflections as possible.
There are many things to consider when trying to create an acoustically treated room and a reflection-free monitoring area. Essentially, though, you need to pay attention to how you place your monitors and speakers according to your position in the room, how sound in the room’s being absorbed, and how sound in the room’s being diffused.
Studio monitor placement
Ideally, monitors should be placed at a triangle-like angle according to your listening position. They should be at least as high as your ears and tilted according to where you’re sitting.
Imagine that sound is like a straight line that comes out of your monitors and speakers. For proper placement, you want the lines coming out of your left and right speakers to meet in the place where you’re sitting.
This way, you’ll be listening directly to the “pure” sound coming out of the monitors, not to the reflections generated by the walls, floor, and ceiling of the room.
The second thing to pay attention to is how far your monitors are placed according to the walls. For proper bass response, you shouldn’t keep your monitors too close to any surface, laterally or otherwise.
Sound absorption and sound diffusion
Now that your studio monitors are placed properly, it’s time to get down to work and improve the acoustic treatment of the room. To do so, you’ll need bass traps, diffusers, and acoustic panels. But first, you should understand the difference between sound absorption and sound diffusion.
Sound absorption is about reducing the level of reflection caused by a certain surface. Porous materials such as soft furniture, for instance, are associated with a high degree of sound absorption. Dense materials such as hard metals and concrete, for example, create a high level of reflection.
Sound diffusion, on the other hand, is not about the amount of sound being reflected, but rather about where sound is being reflected to. Flat surfaces will cause a sound wave to be reflected in just one direction, while bumpy surfaces will cause the sound wave to scatter into multiple reflections.
From an audio professional’s point of view, bumpy surfaces are better because scattered reflections are less likely to cause phase cancellation.
Essential products for acoustic treatment
Bass traps
Bass traps are a product designed for absorbing low frequencies in a room.
Bass traps are typically used for reducing the amount of low-frequency reflection generated by corners. In corners, sound reflections are intensified because there are multiple, conflicting surfaces standing very close to one another that increases the amount of generated reflection.
Like a ping-pong ball, sound waves bounce very rapidly in corners, giving way to unwanted low-frequency peaks that can cause you to make mixing mistakes.
Bass traps are different from acoustic panels (which are also used for absorbing sound) because they are thicker. Lower frequencies have a longer decay time, which means they cause more reflections than mid and high frequencies. That’s why you need at least three to six inches of absorbing material in the corners of your room to properly deal with unwanted low-frequency reflections.
The SoundKey bass traps are great, but some bass traps incorporate a holed pattern and can be used both for absorbing and diffusing sound.

Diffusers
Sound diffusion is used to treat sound aberrations such as unwanted echoes and phase artifacts caused by the way sound waves travel within a room.
That’s why it’s better to mix in front of a bookshelf than it is to mix in front of an empty wall. While the concrete wall will cause the sound waves to be reflected unidirectionally, a bumpy bookshelf will scatter the sound reflections in multiple directions, weakening its perceivable listening impact.
That’s when diffusers come in handy: due to their holed and rutted surface, acoustic diffusers break up sound reflections so that you are not exposed to a clear echo. Since sound’s scattered into multiple directions, the chances of phase issues (caused by reflections that are too similar to the original sound signal generated by the monitors) are significantly reduced.

Some high-quality diffuser wood panels can be a bit pricey, but they will last you a lifetime. Brands such as BXI Sound offer more affordable (but still very good) alternatives.

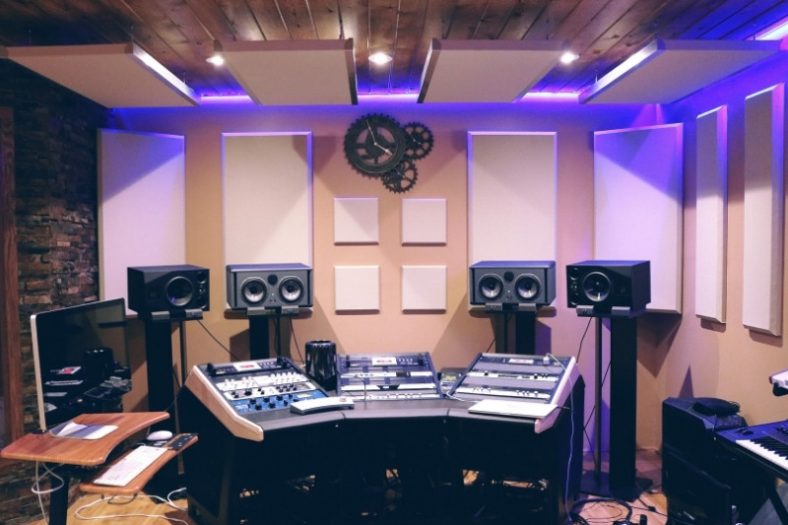
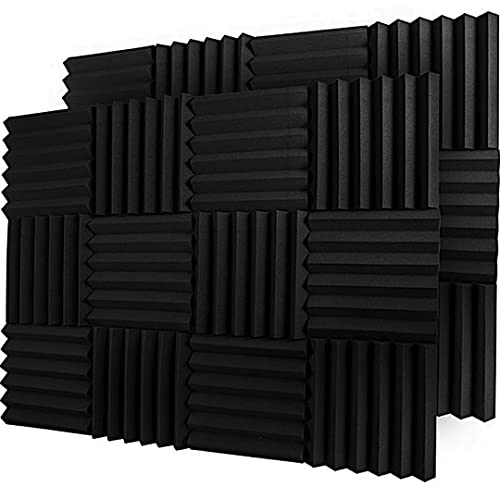
Acoustic panels
The go-to acoustic treatment tool, acoustic panels are made of an absorbing material that can be used for decreasing the energy of the sound reflections generated by the surfaces of a room.
While a sound wave that hits a concrete wall is reflected with a high level of energy, a sound wave that hits an acoustic panel’s partially absorbed and reflected with a low level of energy.
Once again, the ping-pong ball analogy comes in handy. If you throw a ping-pong ball against a hard surface in a small room, it will bounce back (i.e., reflect) multiple times before stopping. But if you throw the ping-pong ball against a soft surface, it will bounce a lot less.
Sound waves are like thousands of tiny ping-pong balls that are being reflected across the room. Acoustic panels dampen their reflections, hence creating a more accurate listening environment.

A set of simple acoustic foam panels should do the trick, but Primacoustic London offers the more stylish (and expensive) alternative.

Five Tips When Adding Acoustic Treatment to Your Room
1. Use a mirror to identify reflecting hotspots
You are investing in the acoustic treatment of your studio, and you have bought all the bass traps, diffusers, and acoustic panels you need. However, you have no idea where to place them!
Well, the best way to start is by identifying reflecting hotspots in the room according to the position of your monitors or studio speakers.
A good way to do this is by using a hand mirror. Place the mirror against the surfaces of the room until you can spot one of your monitors in the mirror. That’s how you know where the sound wave that comes out of the monitor is most likely hitting the wall. Mark the spot you’ve identified and cover it with an acoustic panel or bass trap. Repeat the process for as many surfaces as possible to get all the hotspots covered.
2. Optimize room acoustics with EQ
When it comes to analyzing sound, few tools are more powerful than good, old-fashioned EQ. EQ can help you to understand whether your room has good acoustics, as well as the main issues you need to solve to improve your listening environment.
Many EQ tools can analyze the acoustic properties of a room and help you to improve them. But one of the best happens to be free: the Room EQ Wizard (REW).
With REW, you can record up to 16 channels of audio that work as input traces for measuring the overall sound quality of a room. More than just an acoustic treatment device, REW provides you with handy, personalized tips on how to set up your monitors, how to position your subwoofers, and how to calculate resonances.
You can even use it in real-time to make informed decisions about where to position your bass traps, diffusers, and acoustic panels.
3. If possible, go big!
The room in itself can have a major impact on the overall sound quality of a listening environment. And while most of us aren’t lucky enough to have more than one room available to be used as a home studio, it’s important to keep in mind what makes a room good for acoustics.
Ideally, a good-sounding room should have a minimum of corners and be as big as possible. Maybe not too big: you shouldn’t mix music in a room that looks like a church, due to the high-energy reflections that can give way to loud echoes and reverberations. But if your mixing room is too small, you will most likely encounter peak and phase-cancellation issues.
In small rooms, the reflections are aggravated by being louder and very close together. Since the time it takes for the sound wave to hit the wall and get back to you is shorter, you will be exposed to the reflected sound wave at a higher volume.
Simultaneously, there will be less room for the reflections to scatter, meaning they will be more frequently mashed together, giving way to tricky peaks—especially in the low frequencies.
If possible, don’t choose a room that’s too small for recording and mixing music.
4. Keep the windows on the side
While most professional studios don’t have windows (glass is a super-high reflective material), there’s a chance that your mixing room has one or two. If you’re not a big fan of covering your windows with an acoustic panel, or you don’t have the budget to do so, you can avoid glass-related issues by positioning your monitors laterally to the windows.
If your monitors are directly facing a window, the amount of generated reflections will be very hard to deal with. But by keeping your windows on the side, you can ensure that few to no sound waves will hit the highly reflective glass.
5. Use a professional sound shield for recording
Here’s another tip for musicians and audio engineers working on a budget. If you need to record vocals in a poorly treated room, sound shields make for a convincing (and affordable) solution.
Sound shields are usually attached to the back end of your microphone’s tripod and are wonderful at dealing with damaging, bouncing reflections. In a nutshell, sound shields are a makeshift solution for musicians who want to record something in a room… without recording THE room.
In a perfect world, all musicians would have access to an acoustically treated recording space. But in real life, sound shields are the best way of ensuring that a vocal recording will sound good in a room that sounds bad.
Sound shields are designed to neutralize the impact of the room in the recording and are more effective than you may think. If you need to record vocals right away, and you don’t have access to a professional studio, buying a sound shield is the way to go.
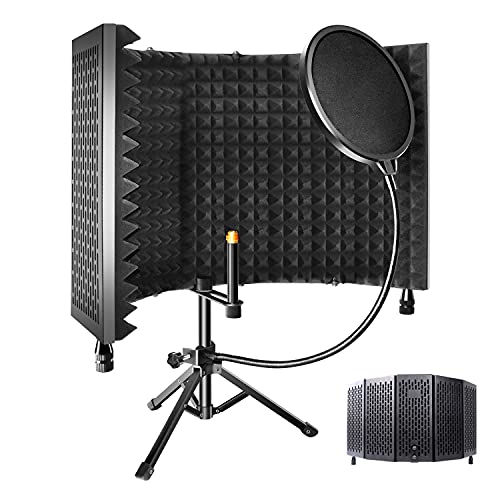
Sound shields are not very expensive and can be less or more portable, depending on what you need. ZOSTA Studio sells a nice sound shield, and you can get this beastly XTUGA isolation booth for just a bit more.

Acoustic Treatment vs. Soundproofing
Acoustic treatment and soundproofing are different. While acoustic treatment is a way of improving the acoustic balance in a room for recording and mixing, soundproofing is about enclosing sound inside a room as effectively as possible.
You need acoustic treatment when you want to create a listening environment in which your ears will not be fooled by unwanted reflections and echoes. You require soundproofing when you want to make sure your neighbors (for instance) cannot listen to the sounds that are being reproduced inside a room.
Think of it as designing a cage versus designing a living room. When building a cage (i.e., soundproofing) your only goal is to keep something (such as sound) from getting out of the cage.
When designing a living room, your priority is to create a balanced living space where you can perform an activity (in this case, mixing and recording music) with as much comfort and quality as possible.
Does acoustic treatment make a difference?
Acoustic treatment can fully transform the way sound moves and bounces within a room, hence significantly improving one’s listening experience.
The louder you’re recording or listening to music, the bigger the difference.
You can notice a huge difference in sound quality in a room simply by removing all of its furniture (or vice-versa).
In the same way, an empty room sounds different from a fully furnished room, so does an acoustically treated room in comparison to a non-treated room. To hear the difference between the two, please check this video:
Why is acoustic treatment expensive?
Acoustic treatment is expensive because it makes use of specialty products that are in high demand.
Additionally, there’s a big market for it, as well as many audio professionals who are willing to spend big bucks in the acoustic treatment of their studios.
Fundamentally, though, acoustic treatment is expensive for economic reasons. It’s a supply and demand matter: acoustic products are not exactly top-sellers outside the audio niche, and there’s no shortage of demand from the professional audio market.
For this reason, many beginners try to upgrade the acoustics of their home studios by reusing materials that are known to have a positive effect on the sound. Recycled mattresses, for instance, make for very nice sound-absorbers for corners, while a bookshelf is the ideal makeshift diffuser.
Is it better to spend more on acoustic treatment and less on your monitors?
In the audio-engineering forum Gearspace, some users abide by the rule that you should spend twice the cost of your studio monitors on acoustic treatment. To be fair, it’s a good practical way to understand the relation between acoustics and studio speakers. While you’ll need both to work with audio at a pro-level, spending a fortune on some world-class monitors is not advisable if you don’t have a world-class room for them to sit at.
It’s not a black-and-white matter, but this is my take on it: if you’re just starting your career as an audio professional, get some decent studio monitors first and then start to consider acoustic treatment.
Studio monitors are essential not only for making music at a pro-level but also for understanding whether your room sounds good or bad. Once you have some decent monitors, you can start working on the acoustics of your home studio. Only then, when you have a proper room to record and mix music, you should go and invest in some pricey, state-of-the-art studio speakers.
Summary
If you’re mixing or mastering, you want the sound that’s coming out of your monitors to be as accurate as possible. That’s what acoustic treatment is all about: neutralizing a room in a way it doesn’t negatively impact your sound source nor the quality of your recordings. To do so, you need proper equipment (bass traps, diffusers, and acoustic panels), a good understanding of how reflections impact perceived sound, and a trained ear to spot peaks and phase issues.
However, please keep in mind there’s a risk of overly treating the acoustics of a room. If too isolated, a room can feel “deadened”—this is the actual term applied by experts—and sound a bit too dry and lifeless. Use your ears to know where you should draw the line and make the most of everything you’ve learned about acoustic treatment.