15 Of The Best Ableton Live Stock Plugins
Ableton Live is very popular for being the go-to DAW for musicians and producers who want to record and play live sets using the same DAW. One of the best things about Ableton Live is all the default plugins that are included in the package. You don’t necessarily even need to download external VSTs and plugins because the stock ones are so expansive and handy tools to have access to.
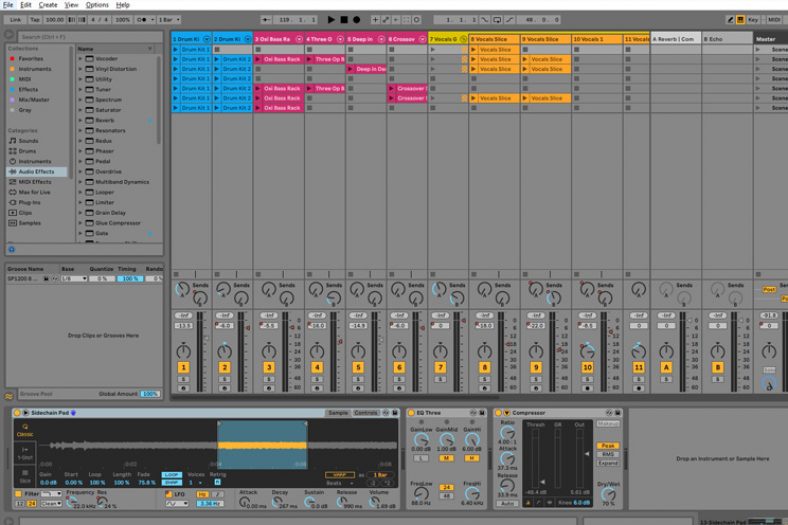
Let’s take a look at 15 of the best stock plugins that come with Ableton Live, what they do, and how to use them. Keep in mind, that you might need to have the Studio version of Ableton Live to use them all.
Contents
1. Operator
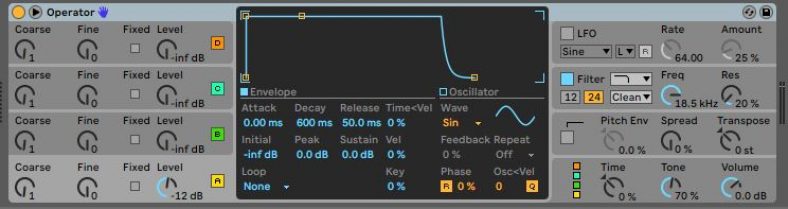
Operator is one of the most versatile plugins on Ableton Live. Apart from the usual categories such as ‘Ambient & Evolving’, ‘Bass’, ‘Pad’, ‘Synth Keys’, etc, Operator has great FM elements and additive synthesis features that can be used to achieve an interesting analog sound.
This plugin can be found in ‘Instruments’ under the ‘Collections’ menu on the left of the screen. You can preview the sounds, pick what you like, and simply drop it into an empty MIDI channel.
If you are someone who likes to tweak intricate details in your synth patch, then give Operator a try. There are 4 main oscillators that you can set according to your preference and use the controls to make additional adjustments to your LFO, device frequency, tone, etc.
2. Analog
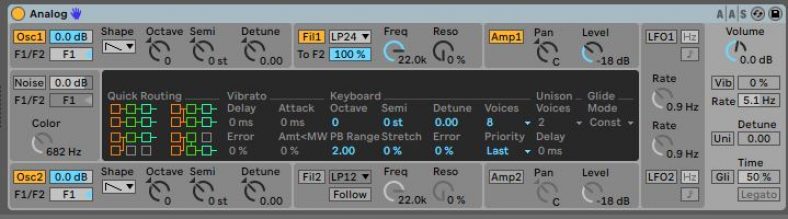
Analog is often regarded as the main subtractive synth in Ableton Live and the closest thing you can get if you are looking for a digital emulation of that rich analog sound.
According to Ableton, this device was created in collaboration with AAS (Applied Acoustics Systems) and is based on their ‘Ultra Analog’ instrument which uses complex mathematics to emulate the behaviors of individual components in real time.
There are two oscillators with pitch envelopes that can be used either simultaneously or individually. You can take your pick from sine, square, saw, or white noise waves and create a custom sound using a combination of any. The oscillators also have their own ‘Amp’ modules with additional envelope filters, and legato and loop modes.
3. Drum Buss
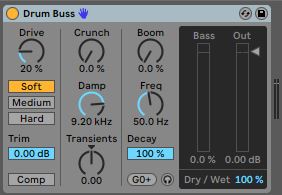
Many users often complained about the lack of a drum processor on Ableton Live. This was a feature that was introduced in Ableton Live 10 and is also part of Ableton Live 12.
The Drum Buss is an audio effect that can be used to process and add character to your drum tracks.
This can be found under ‘Audio Effects’ in the ‘Collections’ menu on the left of your screen.
You can use this to add color to your drums using ‘Drive’, ‘Crunch’, or ‘Boom’. You can even change the frequency of your sound and add compression and transients.
There are two ways to use the Drum Buss. You can either add this to your individual drum elements and set different parameters for each or, group all your drum elements together to modulate the overall sound.
4. Convolution Reverb And Convolution Reverb Pro
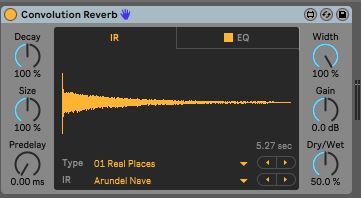
The Convolution Reverb is a sample-based reverb Max4Live device that captures the real-life environment of a physical space and adds it to your sound. You can find this in the ‘Reverb & Resonance’ menu under ‘Audio Effects’ on the Collections menu. They can then be tweaked further to your liking.
The Convolution Reverb Pro has additional features such as EQ, modulation, damping, and even reversing the sample. You can make multiple modifications to the presets and save them as your own. This will give you quick access to your patches.
This device was introduced in 2013 and works in Ableton Live 9 and newer editions. You need to have Max4Live in order to use it.
5. Wavetable
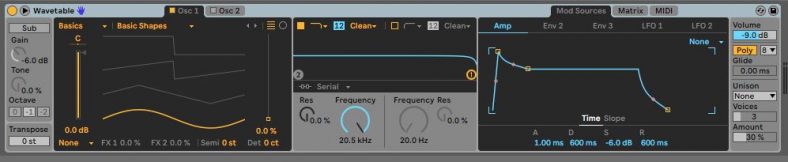
Users have often found this MIDI device easy to use and relatively simpler in comparison to some of the more complex stock plugins. You can build your synth sound by setting up one or two of the oscillators and choosing what kind of wave you want. The ‘Sub’ button generates additional harmonics to the sound by adding an oscillator.
There is also a frequency spectrum with resonance, an amp, envelopes, and LFOs. While this is a great tool for beginners looking to explore modular sounds created digitally, the Wavetable was introduced for Ableton Live 10 and thus is not compatible with older versions of the software.
6. Drum Rack

Apart from a variety of drum kits to choose from, one of the most innovative tools in Ableton Live is the Drum Rack. There are many times when we do not like elements of a particular drum kit and want to swap it for something else. Or, we want to take elements from different kits to create a custom sound. The Drum Rack lets us do just that.
When you go to ‘Drums’ in the ‘Categories’ section, it will show you all the stock drum kits. You can choose one that you like and drop it on an empty MIDI clip. When you open the device, you will see the different elements of the kit. Here, you can swap a sound for a different one. If you choose ‘Drum Rack’, it will open an empty kit. You can assign up to 16 different drum hits from various kits to suit your needs.
The stock drum racks all have a master bus that can be used to EQ and mix your kit.
7. Amp
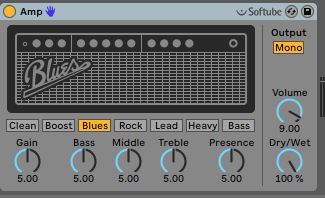
The ‘Amp’ is an audio device that can be found under ‘Drive & Color’ in ‘Audio Effects’. When you are plugging in instruments such as a guitar or a bass, you want to record a clean signal and then add color to it.
The ‘amp’ emulates amplifiers and you can choose between different sounds such as a blues driver, tube screamer, funk, metal, clean, etc. There is also a ‘Bass Roundup’ which adds richness to your electric or acoustic bass.
Guitar or bass players will not find this plugin as impressive as some of the amp emulations on other DAWs, but this is a good tool for those looking for basic EQ settings for their amp, which can be modified further by adding more audio effects to the chain.
Running a vocal sample through an Amp can yield interesting results!
8. Sampler
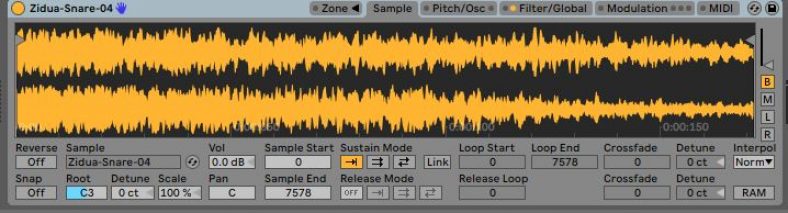
The ‘Sampler’ is another device Ableton Live is widely known for. You can choose from the many different audio samples or drop one on the device. Sampler lets you add polyphonic modulations to the audio using a modulation oscillator and pitch envelope.
If your sample is a long one, you can set a start and endpoint to it, this will trigger only the selected portion. There are 3 LFOs and an Aux envelope to further customize your sound.
A pro tip when using the Sampler is to select the ‘Best Interpolation’ mode when you are transposing your sample. Although this leads to higher C.P.U. usage, it yields more accurate results. If you are adding an additional generative device such as an arpeggiator, you can resample the audio to a new track and switch the device off after you have finished recording. This will take the load off your machine.
9. Auto Pan
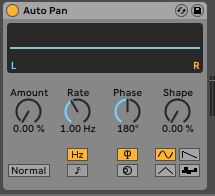
The Auto Pan can be found under the ‘Pitch & Modulation’ menu in ‘Audio Effects’. Instead of manually drawing out the automation of a pan, you can use one of the presets to give your tracks a binaural or stereophonic effect.
You can further modify the modulation amount and frequency (rate), the LFO phase, and the shape of the waveform by choosing between a sine, triangle, sawtooth, and random LFP waveforms and setting their upper and lower limit using ‘shape’. You can also invert the phasing of the pan.
10. Auto Filter
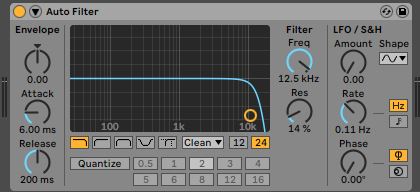
You can access the Auto Filter in the ‘EQs & Filters’ under the Audio Effects menu. Filters add color and body to a sound. You can adjust the envelope, attack, release, frequency, and resonance of the filter on your track.
If you have a repetitive melody or groove playing in your track, then using the Auto Filter is a good way to bring in variation without compromising on the notes or hits. Electronic music producers can do wonders using this, be it at a gig or during post-production.
11. Velocity
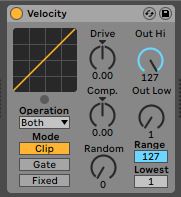
One of the drawbacks of making music on a computer is that it can often sound mechanical. When you play a chord pattern or even a series of notes, the velocity determines its feel. If you are using the pencil tool, then all the notes will have the same velocity, making it sound robotic. Velocity is a great tool to use that will help prevent that.
You can set your velocity parameters and you can also choose to ‘add some random’, this will generate random velocities within the set limit. You can also add a gate, which will prevent it from dropping below a certain level.
‘Velocity’ can be found in the ‘MIDI Effects’ menu.
12. Echo
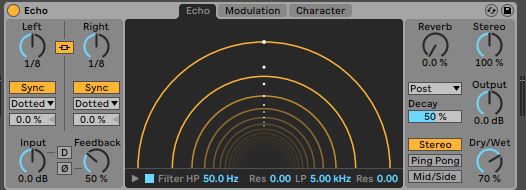
Delays play a major role in music production. Even if you don’t play shoegaze, chances are you will need a good delay effect such as an echo to make your production sound more stereophonic.
Ableton Live’s ‘Echo’ can be found under ‘Delay & Loop’ in the ‘Audio Effects’ menu. You can choose the one you like and simply drop it on an audio or MIDI track.
The Echo is a delay modulation that lets you set two independent delay lines with individual delay times. You can also tweak the envelope and filter modulations. There are three basic modes to choose from: ping pong, stereo, and mid/side.
If you do not have a lot of knowledge of how echo works, you can simply refer to the names (such as ‘Ambient Spaces’, ‘Clean’, ‘Vintage’, and ‘Modulated’, which will give you a fair idea of what to expect from the delay.
13. Looper
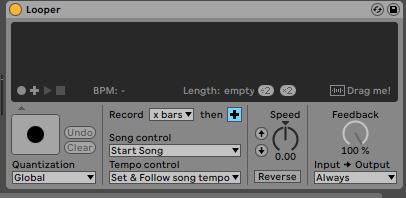
The Looper audio effect is a hidden gem that is often overlooked or not talked about as much as some of the other plugins. But this is an especially helpful tool if you are looking to create ambient textures or vocals with multiple harmonies. It is great for using live and you can simply drag the audio into your project if you want to add it to your recording using ‘Drag me!’.
To set up the Looper, go to ‘Looper’ under ‘Delay & Loop’ in the ‘Audio Effects’ menu. Choose how long you want your loop to be according to the number of bars. Drop it on a new or existing audio or MIDI track. You can now use this like any other looper pedal.
A creative way to explore the Looper is by using the ‘Reverse’ function while stacking your layers. If you are recording an instrument or vocals, make sure that there is no noise or interference in your signal because the Looper will pick it up.
14. Impulse
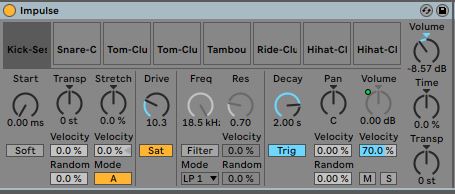
Impulse is a drum machine that can be found under ‘Instruments’ in the ‘Collections’ menu. Like the drum racks or drum machines, the process of setting this instrument up is the same.
However, this is a lot more user-friendly and good for beginners. You can also heavily modulate your drum sound using the chain in the device.
15. Overdrive
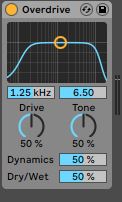
Apart from ‘Amp’, Ableton Live also has an ‘Overdrive’, which emulates overdrive and fuzz guitar pedals. One of the drawbacks of using an analog distortion pedal is that they are often difficult to control. This audio effect, found under ‘Drive & Color, lets you set the distortion at a very high level without compromising on the dynamics or volume.
Although this is not available in the ‘Intro’ and ‘Lite’ editions of Ableton, it can be used creatively on vocal and synth tracks for interesting results. If you want to record guitars or bass and do not necessarily need an analog distortion sound, then you can try this device out!
Are Ableton Stock Plugins Any Good?
The Ableton Live stock plugins are very good. They are incredibly versatile sound-design tools that run extremely efficiently. You can create professional tracks just by using Ableton Live’s stock plugins.
External plugins may do certain jobs much better or with higher quality sound, but don’t write off Ableton Live’s plugins just because their interface may be boring, they may, in fact, be better at achieving certain tasks and creating certain sounds than your external plugins.
If you like to explore sound then these stock plugins are great because they offer endless possibilities in terms of modulation and tweaking. Although it is sometimes easy to get into a rabbit hole of creating the perfect patch, it is important to set goals when you are using the DAW.
Summary
Ableton Live is a great DAW for beginners who are looking for something easy and intuitive to work with. All of these plugins may seem very complex at first and require a bit of a learning curve. But don’t let that intimidate you. A pro tip to avoid spiraling into the sound blackhole is to first play or write the parts and then spend time exploring the different sounds. That way you can be productive and have fun at the same time!