Reaper vs Audacity – Which is Better?
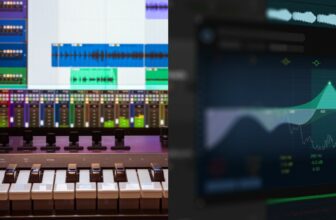
Reaper and Audacity make for two powerful audio-editing tools that share many features. But while Reaper is a full-fledged digital audio workstation, Audacity is best-suited for performing simple editing functions and recording podcasts, radio shows, or audiobooks.
There are some similarities between Reaper and Audacity, but Reaper is by far the most complete software of the two—especially if your goal is to make music! However, snubbing Audacity right away would be a mistake: while seemingly basic, it makes for a versatile recording/editing tool that’s completely free to use.
So, which one is better? I guess it depends on what you’re looking for!
Let’s dive in to learn more about the functionalities of Reaper and Audacity.
Contents
Key Differences Between Reaper and Audacity
- Audacity is completely free, while Reaper is a paid program. However, you can download Reaper for free and try it for 60 days. Many users manage to keep Reaper’s fully functioning 60-day evaluation version indefinitely, meaning it can be free if you want to.
- Reaper can be used to record and edit MIDI files with its handy piano roll pop-up window. Even though Audacity can read MIDI files, these need to be created somewhere else before being loaded into the program.
- While you can use any hardware or software controller with Reaper, there’s no way to directly map any feature of Audacity to a controller.
- Both Reaper and Audacity do not feature stock instrument plugins, but Reaper is compatible with all of your favorite third-party instruments. Audacity doesn’t allow any third-party instruments (only third-party audio effects).
- Reaper allows for complete parameter automation, often with a high level of detail. Audacity’s effects, on the other hand, cannot be automated.
- Reaper is a full-functioning DAW with all the essential features associated with DAWs such as Logic Pro, Ableton Live, or FL Studio, whereas Audacity is a much-simpler audio-editing tool that’s best suited for editing podcasts, radio shows, or audiobooks.
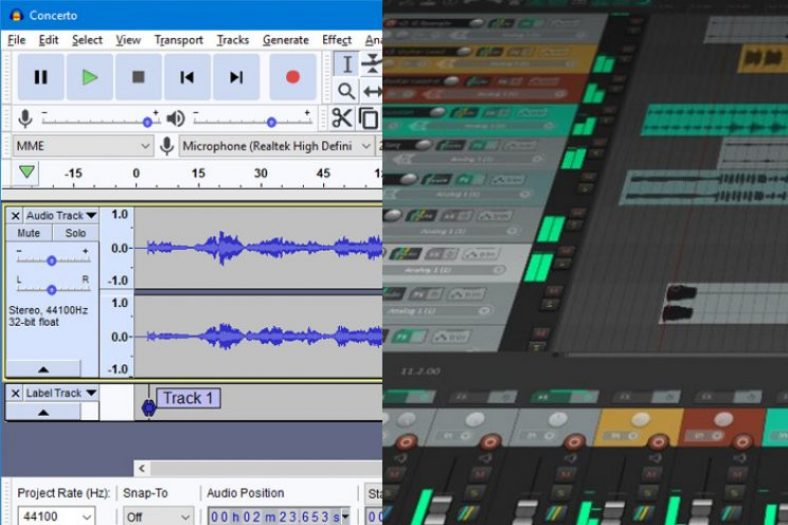
Interface
Reaper’s interface should be very familiar to most DAW users: there’s a horizontal multitrack arrangement view on the top and a master channel on the bottom. But despite its conventional setup, Reaper is designed around the idea of customization.
The standard template shows nothing but an empty window, and it’s up to each user to add tracks and combine features according to his or her workflow.
Reaper’s usability is based around pop-up windows, a distinctive feature you won’t find in most DAWs. To use the piano roll, for instance, you need to do so in a pop-up window; the same applies to functions such as automation and audio editing.
This can sometimes make your screen feel overcrowded, and it can be annoying to work with if you’re accustomed to seeing all the features of your DAW in just one window.
Audacity’s interface is comparatively simpler, although not nearly as customizable. Boasting a relatively outdated design, Audacity features an options tab on the top, a menu with multiple audio-editing tools displayed by icons, and a multitrack viewer where you can edit one or more recordings. Audacity’s interface is built around its centerpiece feature: the recording button.
Just by comparing the interfaces of Reaper and Audacity, it becomes clear that the first looks more like a standard DAW, whereas the second makes for a simpler audio-editing tool with a special focus on broadcasting and vocal recording.
OS Compatibility
Reaper and Audacity boast great OS compatibility, as they are both compatible with Windows, Mac, and Linux operative systems.
Reaper supports all Windows versions from Windows XP to Windows 11 and all Mac versions from macOS 10.5 to macOS 12. Linux’s Intel and ARM architectures are fully supported by Reaper, and the Windows version is said to work fine with WINE.
Audacity supports all Windows versions from Windows 7 to Windows 11 and all Mac versions from macOS 10.7 to macOS 12. To use Audacity with Linux, it’s recommended that you install the program from the official distribution repository using a package manager.
CPU Usage
Reaper is fully prepared to deal with CPU-heavy third-party plugins and features a handy Performance Meter that allows you to follow CPU usage in real-time. Like any other DAW, it presents some issues when overloaded: if you’re working with too many tracks, Reaper’s response worsens, and crashes become more common.
To make the most of Reaper, the trick is to pay attention to the Performance Meter and to freeze any MIDI tracks that may be asking too much from your computer; you should pay extra attention to CPU-heavy plugins such as Omnisphere or Kontakt libraries.
Audacity is extremely light in terms of CPU usage. I’ve never found any performance issues while working with Audacity (even on an outdated computer), but some Audacity users have experienced CPU problems while recording. To deal with this potential issue, all you have to do is turn off the “software playthrough” on Audacity’s Recording tab.
Working with Audio
You can edit audio in Reaper by recording or dragging samples to the arrangement view. You can cycle through samples quickly by using your mouse; in Reaper, short samples are looped automatically.
To explore further editing options, open the ‘Media Item Properties’ menu. A pop-up window with numerous features will then appear. The ‘Media Item Properties’ allows you to explore a decent number of extremely detailed options such as Pitch Adjust, Invert Phase, Reverse, and Volume/Pan.
In Audacity, you must select different icons displayed in the program’s interface to edit audio files. Using keyboard shortcuts makes this process easier; familiar commands can be used to copy-and-paste audio (Ctrl+C/Ctrl+V), delete audio sections (Ctrl+X), and select all audio tracks (Ctrl+A).
For more detailed audio editing, look for the ‘Effects’ menu in the top options tab. The list of available audio effects is not only extensive but highly customizable.
When it comes to audio-editing, both Reaper and Audacity offer a satisfactory number of solutions, albeit in a very different setup.
Working with MIDI
One of the strangest aspects of Reaper (in comparison to other DAWs) is that all newly-created tracks can be used as both audio and MIDI tracks. This doesn’t take anything away from Reaper’s MIDI usage though, since the software is more than capable of receiving and editing MIDI data.
In Reaper, MIDI is edited through a pop-up piano roll window, in which you can drag and transpose notes and play with their dynamic range. I didn’t encounter any issues while editing MIDI files using Reaper.
In addition, different takes can be simultaneously accessed in the multitrack arrangement view, meaning you can quickly monitor them to select the best.
Audacity can host MIDI clips, but it cannot create new MIDI files or receive information coming from a MIDI controller. If you open a MIDI file using Audacity, such a file needs to come from somewhere else.
When you open a MIDI file in Audacity, you can monitor it by pressing play. The MIDI will always be played with the same instrument—a non-permutable, generic electronic piano. You can make small changes to the MIDI by using the same tools you’d use to edit audio, but you cannot change the MIDI notes, nor its dynamic range (there’s no piano roll in Audacity).
Plugin Compatibility and Performance
Reaper’s plugin compatibility can only be described as excellent. You can successfully load all your favorite VST, VST3, VSTi, LV2, AU, and JSFX instruments and effects into the DAW.
Third-party plugins will be listed in a pop-up window that’s very handy. It’s not only perfect for organizing a long plugin folder, but it also allows you to quickly find plugins by searching by name and category.
Sadly, Audacity cannot host third-party instruments, but it does work for VST effects. You can use your favorite VST instruments in Audacity by dragging them to the appropriate folder, usually under /Library/Application. This works for every operative system.
Stock Instrument Plugins
Reaper doesn’t include native stock instrument plugins, but it does feature a nice selection of built-in audio effects. Reaper comes with all the must-have audio production tools, including the ReaEQ, the ReaVerb, the ReaDelay, or the ReaGate.
Audacity presents a much-more limited number of built-in audio effects, all of which must be accessed under ‘Effects.’ However, there are some impressive gems in there, including a good-sounding Echo and a very effective Noise Remover. Sadly, there are no stock instruments included in Audacity.
Hardware and Software Controllers
I couldn’t find any hardware or software controller made specifically for Reaper, but the DAW works seamlessly with any MIDI instrument.
On the other hand, Audacity is not prepared to deal with live MIDI information, meaning it isn’t compatible with any hardware or software controllers. To map the features of Audacity to a controller, you first have to install third-party software such as Bome’s MIDI Translator Pro.
Verdict
Reaper and Audacity are both very useful for editing audio, but that’s as far as their similarities go. Reaper is a bonafide DAW, meaning it can be used to create a music track from start to finish.
Audacity, on the other hand, cannot be exactly called a DAW: it’s more of an audio editor, best suited for audio professionals working in the development of podcasts, radio shows, or audiobooks. It’s not impossible to make a song using Audacity, but it’s quite the stretch of the imagination!
All things considered, Reaper is better for music producers than Audacity, especially if you manage to get it for free using their 60-day trial. But if you’re looking for an easy-to-use audio editor that will not take a lot of space on your computer, you should consider downloading Audacity.