How To Record Desktop Audio With Audacity (Quick Guide)
Recording desktop audio with Audacity is very simple. It’s a great way to divide your sounds and record the audio only from your desktop as opposed to yourself via the microphone. This is useful for audio files on your PC, music, games, and anything similar.
Audacity is a free audio editor with superb ease of use and has many great options for recording audio, both with your microphone and the desktop audio, as you please. The way to record your desktop audio is via a few simple steps. Let’s see how to do so.
Contents
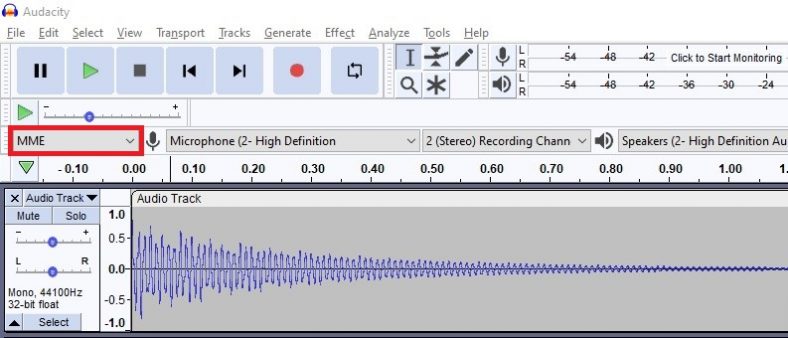
Step 1: Find the ‘Audio Host’ option
Open Audacity and proceed to locate the ‘Audio Host’ option which can be found just under the main controls in the above-left corner.
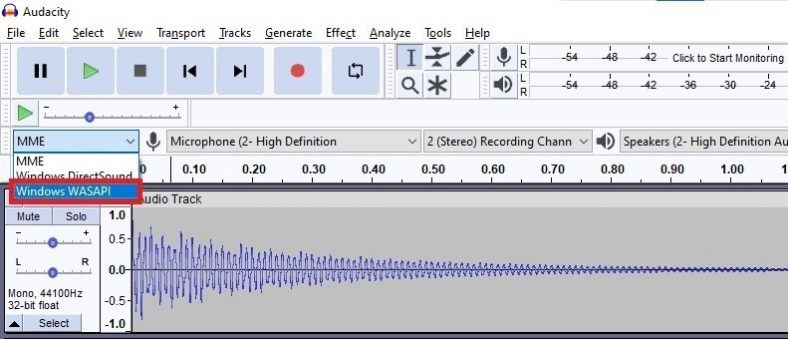
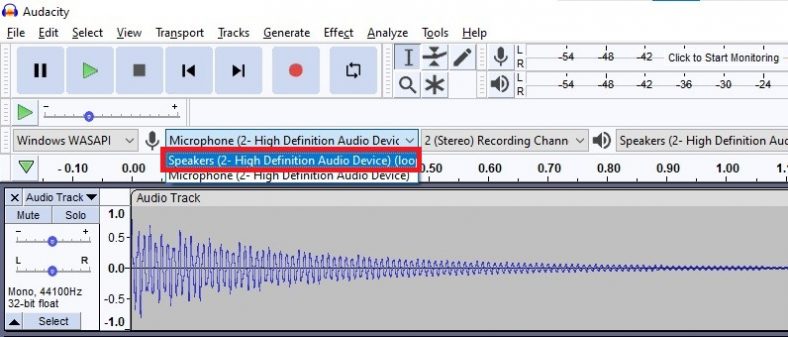
Step 2: Select ‘Windows WASAPI’
Click on the ‘Audio Host’ bracket to display the drop-down menu. You will see 3 options, proceed to choose ‘Windows WASAPI’ from the given options.
Step 3: Choose ‘Speakers’ audio output
After you’ve selected ‘Windows WASAPI’, right next to the ‘Audio Host’ bracket, you will see the audio output selector. Click on it and select ‘Speakers’ from the drop-down menu and you’re good to go.
Press record and you can successfully capture the audio from your desktop, be it an audio file, music, game sound, or anything similar.
Conclusion
Recording audio from your desktop is incredibly easy to do with Audacity. Just a few simple clicks will make this option available. Follow the necessary steps above to toggle this option and enjoy your audio desktop recordings.